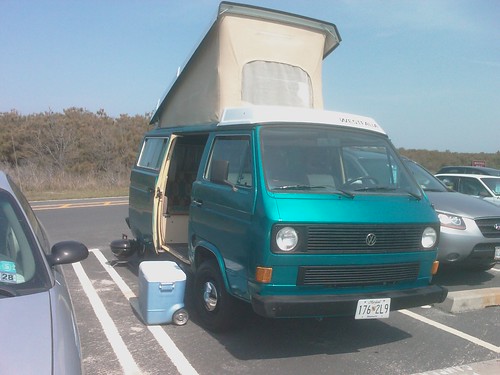
When I walked out of my house this morning the light was too good to not take a picture of my Vanagon. Like I said, the paint job isn't finished but is at least good enough to appear finished from a few feet away. I don't expect anyone to consider this as "proof" that the roller paint job can work since I'm not even finished but I do think it is an excellent example of how deceptive a photograph can be. The van does look good from a distance but the closer you get the more flaws you notice. Once the weather improves I'll have to do something about those flaws and finally finish my never ending project.
Oh and this photo is taken after I believe six coats. The van HAS NOT been sanded in the past two coats and the last time I did sand it I used 800. My plan is to sand it with 1500 and then only paint panels which have issues. One other thing is that I still have not completely repaired my seam rust. I just loaded it up with rust converter, primed, and painted it. I did not put any body filler on it but was just trying to slow down the rust until I can do a panel replacement.
One last thing, if it isn't obvious, you should be able to click on the image to get a higher resolution. It was shot with a camera phone though so if you are hunting for flaws I doubt you'll be able to see them from this distance with the crappy phone. Enjoy!
Monday, December 22, 2008

Monday, December 15, 2008
Electrical Challenges
My latest puzzle is figuring out what is wrong with my second battery. I bought a proper Go Westy auxillary battery kit a few months ago because I was never quite happy with my original setup. Basically I wanted a proper isolator and I wanted to have the radio and interior lights moved over to the second battery. The Go Westy kit would make all of that easy so I picked one up. Thanks to my painting project I didn't get around to installing it until a week or two ago. As usual the instructions were well written and easy to follow but I somehow managed to screw things up. My first problem was that my main battery was draining with the engine off. In fact it discharged so much that in a single day it dropped to just under 4 volts. As you can probably guess that killed my original battery and I had to pick up a replacement. Now I haven't had a chance to really figure out what is going on so I've just been disconnecting the ground whenever I'm not driving so I don't damage the new battery. I really would like to get to the bottom of this issue but winter and the rest of my life are getting in the way. I'll get to it eventually.
Just to warn you guys, things may slow down over the next few months. A combination of sub-freezing temps, salty Maryland roads, and my first child due in a couple of months should result in the Vanagon finding itself on the back burner for a while. My only real regret at this point with it is not finishing the paint job before the cold weather hit. Even if I had the time I can't get that last coat on there. Maybe there will be an unseasonably warm weekend at some point and I can get things wrapped up. Until then it is just going to have to wait - its so close to being nice.
Sunday, November 30, 2008
Vanagon Bong
I have built my own "Libby Bong" thanks to advice from the Samba and a very awesome reader of my blog - thanks Ron! This brilliant little contraption makes it possible to bleed my coolant system from the comfort of my own street without having to jack up the front of my van. A little while ago I replaced my temp II sensor and my temp sender in the thermostat housing of the Vanagon. This went just fine but since I couldn't raise my van high enough to follow the procedure outlined in the Bentley manual I was concerned that I had left air bubbles in my coolant system. I found the details of how to build it over on www.thesamba.com. A guy by the name of Libby devised a simple contraption from a couple of parts available at the Home Depot that artificially raises the level of the expansion tank which allows you to just use gravity to force all of the air into the bleeding column in the radiator. It is just a section of 2" PVC pipe with a 2" to 1.5" "PlumbQuik" connector that clamps to the top of the coolant expansion tank. The brilliant part is the 1/2" OD plastic tubing that inserts just above connector, goes into the expansion tank, and is attached to the top of the PVC pipe. Once you bleed the coolant system you then detach tube from the top, insert it into a coolant jug, and lower it below the expansion tank. That causes all of the coolant remaining in the PVC column to empty back into the coolant jug. Once all of the coolant is out of the column you top off the expansion tank with coolant, replace the expansion cap, and drive off without any air in your coolant system.
The other news from this weekend is that it looks like I've finally solved my freaking out temperature gauge. Thanks to a reader comment from this blog (thanks Jed!) I decided to remove the sensor from the expansion tank and check it for corrosion. Sure enough the probes were covered in some nastiness. I used my trusty wire brush to get them looking nice and shiny again. Now my coolant light no longer blinks! I didn't even have to replace any parts.
The other news from this weekend is that it looks like I've finally solved my freaking out temperature gauge. Thanks to a reader comment from this blog (thanks Jed!) I decided to remove the sensor from the expansion tank and check it for corrosion. Sure enough the probes were covered in some nastiness. I used my trusty wire brush to get them looking nice and shiny again. Now my coolant light no longer blinks! I didn't even have to replace any parts.
Friday, November 21, 2008
Waiting For The Mail
I've noticed that I never want to drive my Vanagon more than when it is undrivable. It has been parked in front of my house all week just taunting me. My replacement fuel pressure regulator just can't seem to get here fast enough. I really wish that GoWesty had one in stock - those guys are super fast. I ended up buying one from Van-Cafe. They are generally awesome and send cookies along with every order but the UPS ground only option from California does make delivery times take a lot longer than I would like. I should finally get it on Monday. At least they are faster than Bus Depot. I ordered some POR-15 and a replacement panel for my rusty kitchen rocker like weeks ago and still have yet to hear from them. Maybe they didn't actually have the panel in stock? It doesn't really matter though because I'm not ready to cut that bad metal out right this minute anyway.
I do have a tiny bit of a paint job update. It may be my imagination but I swear my Vanagon is getting darker as the paint settles and breathes. This is really good because I actually wanted it to be a darker color than it was right after I applied the paint. I really do need one more coat of paint on too but I may just go ahead and do a 1500 pass and buff it out for the winter. I can always go back next spring when it warms up and do a few more coats. I don't mind thin spots as much as the heavy orange peel that I've got now. I may end up doing that wet sanding this weekend. Who knows - I might even post some pictures...
Sunday, November 16, 2008
One More Thing About Headlights
I realized that I didn't do a very good job of explaining what I did to my headlights. Basically I just bought the power boosting kit from www.gowesty.com along with some new higher wattage halogen bulbs. The instructions that came with the kit were top notch and made the install very very easy. Just be sure to actually have a crimping tool if you are going to do the kit install yourself. I have since driven the Vanagon at night and in the rain and I am amazed at how much better the visibility is. I strongly suggest you do this upgrade yourself.
Back To The Engine!
This weekend was filled with rain, wind, and cold weather. It was not the time for doing more work on the paint so I decided instead to focus on a few mechanical issues that I've been having lately. First off I don't feel like my engine has been running as smoothly since I replaced my exhaust system. I don't think this is a result of the exhaust system per say but that was around the time that I stopped driving the Vanagon regularly. If I've learned anything from owning a Vanagon it is that old vehicles like to be driven. Anyway, I had a bit of a rough idle and I'm seeing condensation and white smoke out of my exhaust when I start up the van. Something is not right.
My first action was to replace my O2 sensor again a few weeks ago. This helped a lot with the sound of the engine but it did not fix all of my problems. I'm confident that the O2 sensor that I put in when I replaced my exhaust was faulty but that was not the entire story. So rather than properly diagnosing the problem I decided to just keep throwing parts at my issue. Fortunately the parts I decided to throw were really cheap. This weekend I replaced the two temp sensors on my thermostat housing in an attempt to further smooth out my engine.
This leads me to the other issue that I have seen lately. Typically when I start the van my temperature warning light starts blinking immediately and my temperature gauge immediately rockets all the way to the right. My first action was to check my coolant level to make sure that my engine had enough coolant. I was able to verify that the coolant was fine and that was not the reason the warning light was coming on. A strange thing I noticed about the indicator light was that at times the gauge functioned normally and then at times it would freak out, blink, and rocket all the way to the right. This leads me to believe that I have an electrical problem or the sensor itself is broken. Since the part is cheap I went ahead and replaced the sensor at the thermostat housing. I also noticed that the wire attached to that sensor was worn and it looked like the connector was about to fall off. I went ahead and snipped the wire to expose some fresh wire and added a new connector. I also replaced the temp II sensor since all of the message boards so to just replace the thing if it even might be broken. I believe that the second sensor provides information to the fuel injection system which and that if it is not functioning properly your engine will run rough. While I was dumping coolant in the street I figured I might as well replace mine as well.
When I fired up the van again to bleed the coolant system and to verify that everything was put back together soundly I was impressed with how smooth the engine sounded. I then we back to watch the engine run and to rev the engine I noticed that my fuel pressure regularly was dripping something. Since I don't know what else a fuel pressure regulator could be dripping other than fuel I became concerned. I turned off the engine and went in the house to get a bunch of clean paper towels. Looking at the fuel pressure regulator it did not look like any of the fuel lines going into it were having problems but I wanted to be sure. I wrapped a paper towel around each of the lines at the point where they connected with the fuel pressure regulator and then another under the regulator itself. I fired up the engine again and waited for a minute. After I started seeing the liquid on the paper towel I turned the engine off and inspected my experiment. I should also add that when I filled up on Friday I noticed that my miles per gallon had dropped to 16 from 20 so I was already concerned about a potential fuel leak. Sure enough the fuel pressure regulator itself was seeping fuel right from the seam in the center. I don't know if this is a common problem but I certainly can't drive the Vanagon until I have this problem sorted out.
Later I was telling my Dad about what I had seen and he mentioned that in his experience with Volvos that often before the fuel pressure regulator fails it tends to flood the engine with fuel - I wonder if this is the same type of issue that I am seeing. Regardless, I don't think it will be a good idea to drive the Vanagon again until I get myself a new fuel pressure regulator.
Wednesday, November 12, 2008
Lunchtime Upgrade
Today during my lunch break I finally got around to upgrading the wiring for my headlight and replaced the bulbs with a higher wattage bulb. It really wasn't too bad of a job but hooking in the new wiring was super cramped. It is hard to access the back of the fuse panel. After I checked that my new wiring worked I also went ahead and replaced the headlights. Total time was around an hour. I can't wait for it to get dark so I can see how much of a difference it makes. I was really getting tired of not being able to see at night.
I Learned Something
This past weekend I ended up getting a lot more done on the Vanagon than I was anticipating. I sanded and painted my rear bumper and I solved a major problem with my window seals. On Saturday I hurriedly painted the rear bumper and I am not very happy with it at all. There was some fairly serious surface rust on it and I didn't have a grind wheel in good enough condition to really clean it up. I ended up using a wire wheel which is good at getting out all the rust but it leaves the metal riddled with pits where the rust used to be. I thought a high build rattle can auto primer that I have been using would be enough to clean it up but I was wrong. Sadly the pits show through the final satin black paint so I think I'm going to have to strip it down again and use some filler to get it all sorted out.
The better news though is that I figured out how to fix up my window rubbers. Early on in the painting process I masked them all off and left the tape on for a week. It was really hot that week (wow I have been at this stupid paint job for a long time) and the adhesive from the masking tape kind of melded with the rubber in the window seals. That left me with tape that I simply could not peel off. I ignored it for a while but it has gotten to the point where that tape was starting to really annoy me. My general approach to restoration is to just fix whatever is annoying me the most at that time so this weekend I decided to do something about it.
My first plan was to use some Goo Gone and a rag to scrub off that adhesive. That did pretty much nothing. Next I tried using a plastic pot scrubber - nothing. Then I tried some steel wool - nothing. Next I tried a small wire brush - that was just scratching the hell out of my rubbers so I quickly ditched that idea. Finally I decided to try some sand paper and kind of wet sand with Goo Gone instead of water. That was working but it took a really long time on the places where there was a lot of tape left. However I noticed that the sand paper left the rubber looking nice and new and it was able to easily remove the overspray from my previous owners horrible paint job and the few places here and there where I got paint on the rubbers. The trouble was keeping the sand paper off of the body since I didn't want to scratch the paint. That was when I noticed the small dry wall putty knife that I had in the tool box. It is a 1" knife that I noticed I could easily slide under the edge of the rubber and then could go to town on rubber lip with the sand paper and really clean it up. I also noticed that the blade had enough flex to it that I could use it to scrape up the bulk of the old masking tape without harming the rubbers. So in the end my process was to use the putty knife to scrape as much of the masking tape off as possible and then use it to lift the lip while I sanded the rubber down a bit with 120 grit sand paper. Once I had taken a layer off of the window rubber I used some 303 Aerospace Protectant to reseal the rubber and protect it from UV damage. This left my rubbers looking like new!
Thursday, November 6, 2008
I've gone too long without posting
I forgot to update after last weekend's work. I got in two days of painting on the van and am now ready for another 800 wet sanding pass. I still don't have complete opacity so it looks like I'm going to have to do some more painting passes. The van looks to be one color from a distance but when you get closer you can certainly see some issues. I have really grown a strong dislike for whoever painted this thing blue in the first place. Soo... much... work... This weekend we're having some family in town so I probably won't get in much time on the Vanagon. Plus the weather has been terrible here for paint this past week so I really don't mind giving the paint another week of drying time before I get in there and knock it back again.
One important bit of advice I can offer is to never leave your masking tape on your window rubbers for longer than you have to. I left some tape on for a week and the adhesive sort of melded with the rubbers. Now I've got masking trash all over my window rubbers and it is a real pain to clean off. I haven't gotten out the Goo Gone yet but I'm hoping that will make all the difference. If that doesn't work then I'm considering trying to sand the rubbers. Who knows if that will work but it seemed like something worth trying.
Wednesday, October 29, 2008
Starting to Look Good
Over the weekend I was able to get my fifth coat of paint on the Vanagon. This was the first time that I painted over an 800 grit wet sand pass and wow am I impressed. The surface is certainly not perfect but at this point it at least looks really glossy and reflective. The reflection is slightly distorted but that is to be expected without any sanding. The bad news is that I'm still not at a point where the paint is completely opaque. I don't know how many more coats will be needed but I'm hoping for around two. I am certainly going to need to make at least two more sanding passes before I turn to the buffer but I am pleased with the progress so far. At this point the van is really close to looking nice and I'm really excited to continue moving along on the project. I just hope the weather holds out so I can get this work done before winter really sets in.
Thursday, October 23, 2008
Progress Update
I've got the Vanagon about 80% wet sanded with 800 at this point. I was really happy to see that the color remained relatively intact during this last round of sanding. My plan is to do another three coats and then either do one more 800 pass followed by a final coat or just cutting directly to 1600. Once I've done the 1600 pass it will be time to use rubbing compound and a buffer to get the final finish. This last 800 pass has really got my confidence up though. The Vanagon looks like it may actually look quite nice when I finish this insanely long process. Still no pictures though so you'll just have to wait.
My biggest issue now is that the weather has finally caught up with me. It is getting pretty chilly here early in the mornings and the evenings so I've got to try a new painting strategy for this next round. I'm going to try painting in the middle of the day this weekend but I'm going to do the painting in a parking garage at my office to avoid direct sun. The biggest problem I see with this is that I just don't know how many coats I can get on in the near future. I've got to get this thing done before the temps drop too far below 50 if I want a good finish on the paint. I'm not sure how I can possibly get more than a coat or two on during the weekend since I like to wait at least 24 hours between coats. I would just do a coat a week but if I am looking at four more coats to go then that puts me towards the end of November before I finished - that is dangerously close to bad weather.
I'm also thinking that I'm going to try to get at least the sliding door body work done before the winter as well now. There is a huge dent in it with about a gallon of bondo in it. I was originally thinking that I would just replace the door but now I'm thinking I may try to actually fix it. My plan is to grind out all the Bondo, then get my buddy to weld nails to the dent, use a puller to pull the nails out, grind off the nails, apply filler, and repaint it. This would be by far my most ambitious body work to date but I'd save a pretty big chunk of change if I can do it successfully.
As far as the engine goes, I've suspected that my O2 sensor was faulty right out of the box ever since I replaced my exhaust system. The engine was smelling rich and seemed to be chugging a lot harder than it was before I replaced the exhaust. I bought a replacement sensor and installed it on the van a few nights ago. I still haven't really driven the van but just turning it on in the street and giving the engine a good workout made me think that I've fixed the issue. The engine sounds a lot smoother now and does not seem to be running as rich.
Next up with the mechanical stuff is to replace my temp 2 sensor and thermostat. The heater isn't working in the van and I believe my thermostat is stuck open. I can get hot air to blow in the summer but not the winter and I've read online that the thermostat just needs to be replaced every few years or you'll end up with a problem similar to mine. I hope to tackle this job before it gets too cold. I'm a little bit intimidated with the cooling system mostly because I really don't want to dump antifreeze all over the place. I've read online about using a shop-vac to drain the system so I suppose I should just jump in there and give it a shot. I don't know what I'm so worried about - antifreeze is a lot nicer liquid than gas and I've done plenty of work on the fuel system at this point.
Friday, October 17, 2008
I painted my front bumper and some other stuff
So I went rattle can crazy over the past few days and painted my wiper arms, door handles, and front bumper with Rustoleum Semi-Gloss Black. Who knows if the paint will last but man they look really nice right now. I sanded them all down with 220 and then used some rattle can automotive primer. After that I laid down around four coats of black taking 30 minutes between each coat. In the case of the handles I left them to dry in the sun for 48 hours, wet sanded them with 400, and then put another three coats on. I'm worried that I've lost the hot summer weather that my drying times are going to go through the roof on these painting projects - on the plus side the paint seems to be going on a lot better.
Anyway I put all of that stuff back on the van and I'm getting impressed. The paint job still needs a ton of work on the van but its starting to look good. I've got three coats of paint on the van right now and its time for more wet sanding. The side that gets direct sun has a ton of orange peel to it (funny how much direct sun will impact paint) so I need to take the time to knock it all down with some 800. This may be a bit premature but I believe that after I sand and get another three coats on I'll be ready to do a 1600 wet sand and then buff with rubbing compound to get it finished up. My expectation is that the large flat areas will look just as good as they would have if I had taken the van to be painted at a shop. The real test though will be all of the hard to reach areas and areas around the windows. You just can't do a good job if you're leaving the windows in the van. I think I'm going to have to end up rattle canning parts here and there to get decent coverage in some of the seams and what not.
Tuesday, October 14, 2008
Guess What I'm Doing!
Still painting...
This morning I got the third coat of paint on all of the flat panels on the bus. I still haven't reached the point where the paint is opaque but I am making progress. I've made another slight modification to my painting technique over the past few days that has helped me get even closer to a mirror like finish without using any sand paper. I purchased a second 4" roller that I leave dry and use it to pop bubbles/evenly spread paint. Now my system is to use the paint roller that has been soaking to push the paint over an entire panel. I work quickly but now that the bus is getting smooth I can't press hard or I will slide. I then stick that roller back in the paint to soak while I use my second dry roller to smooth out the paint and get rid of any bubbles. I've also noticed that the side that remains in the shade almost all day has turned out dramatically better than the side that catches the sun. From here on I will only be painting in the shade. This isn't really a problem provided I get started nice and early. I have reached the point on most of the bus where it really doesn't make sense to keep painting until I can wet sand the stuff I've done already. The build up is starting to approach bumpy so I think it is time to knock it down. I'm planning to go with 800 for this next round of sanding in the hopes that I can keep as much paint on the van as possible.
In addition I've also been painting a few trim items. I painted the rear air vents to match my front vents with the subtly textured black plastic paint and they look really nice. I also painted the door handles last night and am going to add the wiper arms either tonight or tomorrow. I need to decide what I'm going to do with my side mirrors as well. I've got some cheap replacements that I may put on there or I might just try to stick with the stock ones that I've got and paint a few bits of them. Finally, I think I'm going to do a quick rattle can job on my bumpers just to complete the newish feel.
I've still got a really long way to go on my paint job. I can't stress how much work this job is requiring. It is the kind of work that offers a lot of satisfaction but its work none the less. I am super confident that I can make the flat panels look absolutely amazing now but I am still doubtful of the harder to reach areas. I've been trying different small brushes in the hope that I can find something that offers a finish similar to the roller. It is really hard to get a smooth finish on the areas that are difficult to sand and paint. I am guessing that I will finish the main body panels long before I finish the smaller trim details.
Finally, I'm at 95% positive that I'm going to give my bus the "GoWesty black out treatment". Basically I will be painting the lower 15% of the Vanagon with truck bed liner painted gloss black. It should give a kind of rugged off-road look and will help to protect against road rash and salt. I want to do the entire undercoat but its not going to be an easy job to try to do in the street.
Once I get all this exterior painting done I'm going to turn my attention back to the interior and focus on getting the Vanagon trip ready for next Spring. Allison and I will be having our first baby next February and I want to be ready to start showing him the world in our little mobile home soon afterwards.
Friday, October 10, 2008
Site Revamp?
Now that my Vanagon is no longer the blue color you see at the top of the screen I think I'm going to have to revamp the site shortly. Maybe once I finish the paint job I'll post the pics and do a grand unveiling.
Thursday, October 9, 2008
More Painting...
I developed a refinement to my painting technique that seems to be doing an amazing job. It allows me to put the paint on really thin and almost perfectly smooth. I've created virtually zero orange peel since I started using this method. What I am doing is using a good deal more mineral spirits than I was using previously. I mix the spirits with the paint in the paint tray using a paint stirrer. To mix the paint and spirits I'm using a side to side motion with the stick kept at an angle to kind of force the paint on the bottom to rise to the top where the spirits are. I never move it fast enough to generate bubbles. After that I let the roller soak until it is completely saturated. I then roll it out on the tray until there is no dripping. With my roller full of paint I target an entire panel at once and work very quickly applying pressure to the roller to push the paint side to side all over the entire panel. Once I have coverage I typically have a relatively empty paint roller and I use it to very very gently pop the bubbles in the paint working from bottom to top with vertical movements. The bubbles should pop almost instantly if you've used enough mineral spirits but the trick is to continue working the paint for a few minutes. Just use gentle motions and try to be very soft and continuous. Your goal at this point is to softly work out the orange peel while the paint is settling up. Ideally you would look at the panel from an angle where you can really see the gloss on the surface. You can literally see the orange peel setting up. That is when you need to carefully take your roller in there and knock it down. Keep doing this until the paint starts to get sticky. At that point it will basically be set up and you will have dramatically reduced the orange peel that you have to sand off later. The key is to do an entire panel at once to avoid seems, work very quickly initially to get the paint on there, and then very delicately to smooth the orange peel.
Monday, October 6, 2008
So I've Been Painting...
I've been painting for one month, five days, seven hours, fifty one minutes, and twenty three seconds. That's bad enough but the really depressing part is that I haven't even gotten one whole coat on the van. This process is TIME CONSUMING people. When the people who write up their experiences with the $50 paint job on message boards notice that several months pass between posts. This isn't because they are lazy - it is because it takes an insane amount of time. I just want to prepare the people who are considering this route that it takes a while. Now that I've made that clear here is what I've learned so far.
My first step was to sand the front of the van using 60 grit. In hindsight I think this was far too aggressive. I knew I had wavy panels but 60 is a little bit intense and requires a whole lot more sanding to get back to smooth. I then moved on to 120 grit dry. This is more reasonable but I still think it is too intense. Finally I went to 320 grit. This is a little too light for that first pass. I've read that you need to use at least 320 or lower to give the new paint something to key into but 320 is pretty slow going if you are starting with a really bad wavy job. I ended up settling on 220 to do the entire body first pass and I think it is the way to go if you are starting with a crappy paint job. If you are starting with a better job (and seriously you may want to reconsider your approach if you've got a decent job) then use something closer to 300.
Back to my story though. So after I sanded the front for the third time I decided to give body work a try. I got the best body filler I could find (which was still quite crappy Bondo brand professional filler) and decided to just give it a shot. I used the angle grinder to get down to metal on any dents I could feel or any spots of bubbling paint. I then hit up the four spots that I identified as needing work with the filler and I was surprised at how difficult it was to apply evenly before the hardener kicked in. I think either the weather made it difficult (it was hot) or I am just too inexperienced but it was a lot harder than I was expecting. After a few coats and way too much Bondo in the trash can I got some results I could live with. Once the filler dried I sanded it with 120 and then 320 until it couldn't be felt. I can't stress how important patience is with body work. In hindsight I wish I would have taken more time myself. I'll get into patience more in a bit.
With my body work sanded and ready for primer I decided to go with Rustoleum rusty metal primer. I used a 4" high density foam roller to apply it unthinned. It went on looking relatively smooth and gave me surprising coverage. Since I used nothing to cut it, I decided to give the primer almost two weeks to dry before I touched it again. When I returned to the van the primer was good and hard but horrible orange peely and down right cratered. It really didn't look so hot but I decided to forge on and start wet sanding. I wet sanded using 400 I believe. This was my first time wet sanding and I really didn't do the greatest job on it. With wet sanding you need that paper to have soaked for a full day if you want it to be easy to work with. You also need your sanding blocks pre-selected to fit in every space that you need sanded before you start working. I didn't have either and honestly didn't use enough water but I did manage to hit every square inch of the paint with sand paper.
Finally the moment I've been waiting for. Time to hit the car with the actual paint I wanted to use. I selected an almond Rustoleum professional grade oil paint and I thinned it around 15% using odorless mineral spirits. I soaked my roller just like everyone on the Internet said I should and I went to work. The second my roller hit the car I was dumbfounded by how utterly hopeless my cause appeared to become. Instead of nice lovely self-levelling paint I was greeted by a billion air bubbles and drips. I frantically ran my roller over all the bubbles hoping that everything would get better but honestly it didn't help much at all. I then remembered the advice of one online painter that the first coat will give you serious doubts as to the utility of this method and I resolved to press on. And press on I did, covering the entire front of the van in this bubbly concoction. Towards the end I was getting really sloppy and just trying to get paint on the surface. By the time I finished I was beginning to seriously doubt this whole adventure. The van looked worse than ever and I really had no idea what I was going to do about it.
After a few more hours past I decided that I could just sit there looking at this fiasco so I grabbed my roller again and decided to put on a second coat. The second time through went a little bit better. I learned more about how to work the paint to get the bubbles out and I did a much better job of applying the paint smoothly. When all was said and done I had a brutally orange peeling but single color cab. Just having a solid color of paint on my van gave me some hope and I left it to dry for a week.
This brings us to weekend before last when it was time to try to correct my bumpy van with elbow grease, sand paper, and a lot of water. Nature decided to give my wet sanding a hand and rain all day on Saturday. Undeterred, I pressed on and grabbed my trusty 400 grit wet sand paper and literally stood in the rain wet sanding all day. The surface was so riddled that it took me eight hours to wet sand the driver's, passenger's door, and front of the van. The labor involved was a bit overwhelming but I ended up with the smoothest van 400 grit paper could possibly provide. The sad part is that I ended up sanding through a ton of the work I had done. There were dozens of places where I not only sanded back down to the blue paint but made it all the way to the OG primer. I even hit metal in a couple of spots. It was during this process that I realized just how sensitive body work is. If you really want a level surface on a vehicle that has been abused for 24 years then it is going to take a whole lot of work.
The next morning I woke up and decided I'd learned enough - time to jump in with both feet and tackle the entire van. If I continued in a piece meal fashion then it would take me six or seven months of weekends to do the entire thing. I decided to dry sand the entire untouched portion of the van with 220. This was the dawn of a new strategy. My new strategy would be to make the van all one color at any cost forgetting about the body work here and there. My thinking is that if I can at least get my van looking semi-decent again I will have the patience to do the body work that is needed. This will end up creating more work for me in the long run but right now I just want my van to look semi-normal once more so I'm going to see where this strategy takes me. I did grind all of the paint bubbles just to get rid of the obvious surface rust but I didn't worry at all about dents or dings. Right now I am just painting.
This brings us up to the past weekend. I began the weekend with a "prepped" van. I say prepped in quotes because I was obviously ignoring several spots on the body that will need more work to look nice. Like I said though, the new strategy is to just get the van all one solid color. I also did some more research and gave the paint thinning and mixing process a lot more attention this time around. I used a lot more mineral spirits and put a ton of time into avoiding air bubbles introduced during the missing process. I spent probably 30 minutes just mixing up a tray of paint slowly stirring it to avoid air. Finally the time came for another coat. I decided to start with the area that I lovingly wet sanded in the rain last weekend. This time, for the first time, I finally grasped how this process is supposed to work. I soaked my roller and very carefully rolled out the excess. I then applied it very gently to the metal and quickly worked to spread out the paint. I used around 20-30% mineral spirits this time and could instantly see the paint self-level without running down the side of the van. This time there were far fewer bubbles thanks to my extended mixing session but the ones that did appear popped quickly or could be gently rolled out with my roller. For the first time I was truly seeing a very smooth finish on the van and started to believe that this insane idea just might work. Finally the van was looking like it might one day look like a normal vehicle once again!
The down side is that I was painting painfully slowly. You get paint on and then you spend a good deal of time slowly working what you've applied ever so gently trying to get a smooth mirror-like finish. It is tedious and slow but I now believe in the method. I'll do anything to avoid another marathon wet sanding session that ends up destroying most of the paint that I spent hours applying. I can already tell though that this time I'm going to be able to jump up to something like 800 grit paper and I'm going to be able to keep most of this paint intact.
This brings us to the present. My plan going forward is to apply two complete coats of paint and then wet sand using 600-800 grit wet. While wet sanding I will also be washing the car to avoid any buildup. This is important because the resulting dust will be do fine that unless washed off it will almost adhere to the surface and will hurt the smoothness. I am estimating four coats until 90% of the surface has complete coverage. Alternating one weekend of sanding followed by one weekend of two painting coats I am looking at another month of work to get to a surface that may be ready for buffing and polishing. Man this job takes a long time...
The only other detail that I've left out is that I am contemplating a paint switch for the final few layers. There is a beautiful single stage polyurethane paint designed to be rolled on boat hulls called Interlux Brightside that I may switch to. This paint is designed to be salt and UV resistant and has amazing self-levelling properties. The catch is that it is more expensive than Rustoleum and I hear that it is also softer. So I'm thinking that I'll get a solid base done with the cheaper Rustoleum paint and then top it off with the Brightside. That will give me a very hard base that I can get nice and level that I can then top off with a beautiful UV resistant paint. I haven't made up my mind about that part yet though.
Finally one last thought, if you are doing this in the street in the city then prepare yourself for almost constant humiliation. When you see this job in process it looks like the person executing it is completely and totally insane. Looking at the paint go on it doesn't look like there is any hope what so ever of it every working out well. The van looks like a complete disaster and you're sitting out there painting a car with a roller. Basically you will look like an idiot and people will constantly call you out on it. I've just taken to telling people that I am applying a primer. Seriously you will look like you have no idea what you are doing and you will draw attention to yourself. Just be ready and hope that one day it will all come together and your van will once again look like a regular vehicle. Until that day just press on while quietly chewing on your humble pie.
Tuesday, September 2, 2008
I'm painting!
Yesterday I finally got in a full days work on the van for the first time in several weeks. I was able to finish sanding down the paint and did four different body repairs. It was my first time using body filler and I think I still have a lot to learn. Most of the filler I mixed ended up in the trash because I couldn't quite get the amount of hardener needed correct. Maybe this is just how it is supposed to be but I would get maybe a minute of usable filler. Anyway, I wouldn't say my panels are perfect but they are better than they were.
The most exciting news to me though is that I got primer rolled on the cab portion of the van. I decided against thinning it and just rolled it on straight from the can. I think it went fairly well but it is hard to tell until I wet sand it. If nothing else it was a really good learning experience and got me comfortable with the small high density foam roller and foam brush. I'm going to hold off on pictures a bit until I've got more of the work done but it is exciting to finally see some primer on my bus.
Monday, August 25, 2008
Another Weekend Without Work
It turned out that I didn't get a chance to work on the van afterall this weeend. The really sad thing is that it doesn't look like I am going to be able to continue my painting experiment until the end of September. I'm getting really ansty to just start painting the thing. They say that good paint and body work are about patience and I'm starting to understand why that makes the job so difficult. I just want the van to hurry up and start looking good. Must learn patience...
Friday, August 22, 2008
I Drove 1200 Miles Without Issue
I must say that I am quite proud of my van. Last weekend I spent five days driving over 1200 miles without a single issue. I think it is safe to say that the new exhaust was a success. In spite of high 90's temperatures and loads of construction and stop and go traffic I managed to get everywhere that I wanted to go without a single glich. Here's a picture of my route: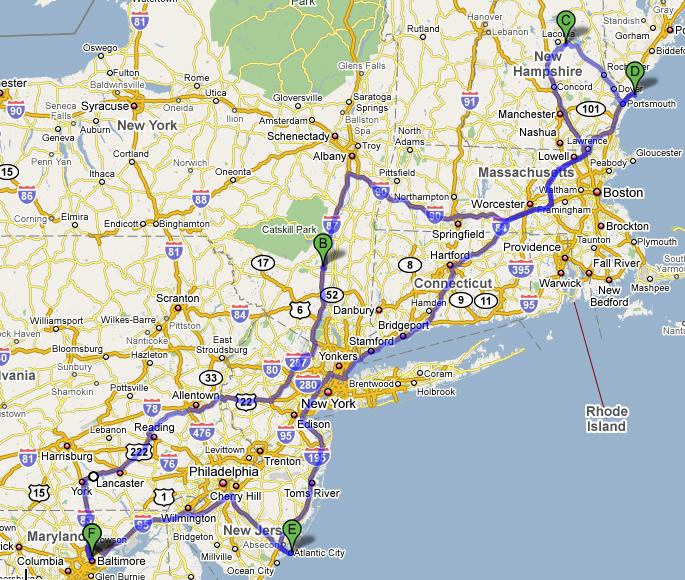
Now back to sanding, sanding, body work, and more sanding as I continue to get ready for my new painting experiment. So far the cab has gotten two passes, the old body work removed, and some rust treatment. This weekend I'm hoping to finish the cab body work, get one more sanding pass, and some primer on there. Next week I should start putting down color. Hurray!
Wednesday, August 13, 2008
Bigger Fish to Fry
My exhaust work appears to be complete. I can not feel any leaks, can't hold my hand over the tail pipe for long, and I can't hear any strange exhaust leak like noises. That doesn't mean things are perfect though. Its been a while since I was able to run my van and it sounded good so I can't say if this is an old or a new problem but the engine doesn't seem to be able to find a comfortable idle. It isn't stalling or anything but my idle is not smooth at all. My hunch at this point is that it has something to do with my O2 sensor that I replaced when I replaced my exhaust. Perhaps my old one wasn't working corectly or maybe the new one is a bad part but whatever the answer is something ain't right here.
The good news is that I'm honestly not all that concerned. I'll figure it out eventually but I'm not in much of a hurry right now. In fact, I'm actually enjoying a bit of a power boost thanks to the new exhaust. It is subtle but it is there for sure. All things considered, I'm looking at this exhaust switch as a win.
Not wanting to just sit around an enjoy my van like a normal person I dove in to the deep end last weekend and reached the point of no return. As I'm sure any regular reader of my blog can tell, I've been completely annoyed by my paint and body work since pretty much day one. It is the one thing that makes me seriously consider selling my van and getting another. Its like the thorn in my side and I haven't been able to do anything about it yet because I couldn't find any way to get everything done without spending thousands and thousands of dollars. In fact, just for fun I called a reputable VW restoration shop that is in the neighborhood and sent them a bunch of pictures. I told them I didn't want a competition paint job but I wanted the van to look nice and shiney. They said no problem - that'll be around $15,000...
Clearly I'm not spending 15k to make my van pretty. However, my van not being pretty is bothering me. I'm at an impass. Fortunately for me, as usual, my wife is saving me from myself. See if it was my call alone I'd probably just buy another van. That other van would be nice but it would cost about 6k and it would have it's own bag of issues. Thanks to my wife this is not an option. This van is my van and I can't have another one end of story.
So I decided it was time to get creative. Creative is good and all but I'm not sure how creative gets me a $10k paint job when I don't even have a compressor or a garage. As usual the Internet is to the rescue. A few weeks ago I happened to catch an email on the Vanagon mailing list that mentioned a hand-painted paint job. I thought, ugh that sounds terrible! However, I loaded up the pictures and was surprised to see that honestly they weren't all that bad. I dug through the thread for a bit and I found a few links to various message boards discussing the technique. Evidently some body/paint guy decided to see how cheaply he could paint one of his old cars back in 2006 and decided to do an experiment. His parameters were to spend as little as humanly possible but to end up with something that could be mistaken for passable pro job. He headed down to the hardware store and bought Rustoleum, some mineral spirits, several 4" high density foam rollers, and a pile of automotive sand paper. He prepped his car as if he was going to send it to the spray booth but instead of spraying it he diluted his Rustoleum using the mineral spirits to the consistency of whole milk and used his 4" rollers to roll it on the car. He used foam brushes to smooth out any rough spots or hard to reach areas. When that first coat got finished he thought he had made a terrible mistake. The car looked terrible but he decided to continue the experiment. He then diligently wet-sanded the car by hand and continued applying coat after coat of the hardware store paint. It took him over seven coats but when it was all done, buffed, and polished the job actually looked good. In fact it could easily be mistaken for a spray job. Certainly not the show room perfect contest winning job but considering the guy used rollers and did the work in his drive way it was spectacular. His final cost... $50
This kicked off an Internet flame war. Pro painters were mocking his choices and saying there was no way that paint would last. Some people accused him of spraying the car and lying about it. Others wanted to try it themselves. Two years later and his paint still looks awesome. Since then dozens if not hundreds of others have given his technique a shot as well and have posted their results. To my eye it looks like you basically get whatever you put into the job. If you do the prep well, diligently sand, and give the paint time to set and breathe properly then you'll get a decent job. In fact, last summer Hot Rod Magazine decided to put this theory to the test and painted a car themselves using this technique. They were actually impressed and have even convinced some to say that they will never spray another car again.
Welp, I've decided to join the masses. In the past month I've done a lot of reading about the do's and don'ts of paint and prep. I've decided that I subscribe to the theory that you either go all out and pay the big bucks for the best paint imaginable or you do the job as cheaply as possible. Fate further pushed me towards taking the plunge when last weekend at the Lowe's I found three quarts of Rustoleum in a color that looks almost identical to my Van's original ivory color. I took this as a sign and went home and started my prep work.
It turns out that sanding a car is a huge pain in the ass. In order to avoid being overwhelmed or rushed, I've decided to paint the car in sections. Right now I am going to paint the cab all the way to completion before I worry about the rest of the van. I selected the front because it offers the least amount of body work and relatively few huge areas that will readily show off imperfections in my work while I am learning.
My first job was to find all the paint bubbles or anywhere on the front that looked like it might have signs of rust and I used my grinder + wire wheel brush to strip the paint down to the metal. Once exposed I used 60 grit sandpaper to remove any trace of rust. Next I decided that there were so many issues with my current paint job that it was worth the effort to do a full pass using 60 grit to take out as much of the old paint as possible. I'm doing all my sanding with a block or by hand. No power tools. At this point I have the entire cab sanded with 60 and I am about 90% done with a second pass with 180. I'm striving for good level panels at this point.
When I finish my 180 pass then it will be time to use the body filler to address all of the issues I've found and get something on the bare metal. I'll also put some rust inhibitor on any place where I've hit metal before I use any filler. I'm trying to avoid filler where possible but all of the problem areas are not places where I can reach the rear of the panel to hammer out the flaws. Once the filler is in place then I'll knock it down with 180 and then do a final pass with 320. I'm debating priming but lately I'm leaning towards rolling on the primer. I don't think that I have to do it but I'm not sure if I should do it or not. I may just end up spot priming the filler but I'm concerned that will lead to uneven color. I just don't know my paint well enough at this point to really know. My paint is also just a hair lighter than my original color so I was considering using a red rusty metal primer in the hopes that it would darken my final color just a touch. Regardless, I've got time. I'm really trying to take this job super slow so that I can get good results. The prep is taking a lot longer than I originally anticipated but I think it will end up well. I've got to admit that I am really eager to get that first coat on though.
I'll post pictures when I get around to uploading them.
Saturday, August 9, 2008
I Fixed the Exhaust... Sorta..
On Friday night I re tightened all of the bolts on the exhaust and could no longer feel any leaks with my hand but the engine sounded like crap. I decided to go for a test drive anyway and by the time I got back it sounded even worse. I noticed that there was a hole suitable for a O2 sensor on the new catalytic converter that I could have sworn had a bolt in it when I drove off. That explained at least part of the horrible sounds I was hearing. Without that bolt, most of my exhaust was just shooting out of that hole bypassing the muffler entirely. Luckily I still haven't thrown out my old exhaust and I noticed that it had the exact same bolt in it. Sadly it looked completely fused to the rest of the cat thanks to 24 years of rust and decay. It took me a full day of periodic PB Blaster applications but eventually I was able to work that bolt free and plug my exhaust.
On to the next issue. With my exhaust now completely I was greeted by a very loud knocking sound whenever the engine was running idle. This completely stumped me so I turned to the www.thesamba.com for help. I read about some problem with lifters being misaligned often causing a similar noise and fortunately the first step fix was to just change my oil to a high mileage 20W-50 oil. I was due for a change anyway so I went ahead and changed my oil. Afterwards I took another test drive and after a few miles the sound went away.
Next issue, my engine just doesn't sound as steady as it used to. I was thinking this must be because of the O2 sensor because I was also dripping what looked like fuel out of my exhaust pipe. I think I'm running rich and everything just doesn't sound as rhythmic as it should. I disconnected the O2 sensor completely to see if anything changed and nothing did. My hunch is that I don't have a good connection on my O2 sensor. I didn't have a proper crimping tool when I did the wiring so I'm thinking I might just not be getting a good enough signal to the computer and it is screwing up my fuel injection or something... TBC
I also tried to tackle fixing my leak by replacing the seal on the luggage rack since the old one broke and I finally replaced my antennae as well. I'm hoping one of the two was the problem but I'm going to have to wait until the next storm to get the answer.
Thursday, August 7, 2008
I am slow...
Man, I've really been neglecting my Vanagon blogging lately. On the bright side however I have not been neglecting my Vanagon. In fact I've been quite busy with it. Sadly, I have not been driving it. In fact I don't think I've moved it more than 10 yards since my post last month. On the bright side though I have been trying to fix the problems that I mentioned in my last post.
The main thing I did was order a complete exhaust replacement from www.van-cafe.com. I got it a few weeks ago and have been doing my best to get the thing installed. The work really isn't all that hard in theory - I mean I'm just unbolting a bunch of metal and then rebolting a bunch of different metal. How hard could that be? Well, so far I'd say pretty hard. Saturday before last I started this epic and it took me most of the day to get my 24 year old rusty exhaust off of the van. I need to give a huge shout out to PB Blaster for making it possible to get all those nasty old bolts off. It may have taken me most of the day but I did manage to get everything off the van without using a torch or my angle grinder.
I figured Sunday would be an easy and quick install for the new stuff after getting all that old junk off. For the most part I was right. It wasn't all that challenging to bolt everything together. Then I cranked the engine expecting to hear a nice smooth engine purrr. Instead all I hear is chug chug chug chug - NOOOOO!!!! My exhaust is leaky.... I must just need to tighten something up right? I spent that night until dark trying to get rid of those leaks and never did get things quite right. I ended up having to put the project on hold while I went out of town.
Well I got back to the van last night and once again tried to get rid of my leaks. I worked on the van about an hour last night and really didn't make any progress. I've still got a couple of leaks and a chugging exhaust. I'm going to give it another go tonight in the hopes that I can get things smoothed out.
In other news, I've concocted the craziest plan I've had for the van to date. I've been complaining about my paint job for most of the past year but I haven't figured out a solution. No matter what I thought of I was looking at at least a thousand dollars to make something happen. That is until I stumbled onto the Internet craze of painting your vehicle with a roller and Rustoleum!!! Yes folks, I found the $50 paint job. I was highly skeptical at first but after doing a lot of research it sounds like it just might work. So as soon as I get my exhaust sorted out I'm going to start doing the body work that I need to do to get my van ready for paint. After that I'm going to break out the rollers and go to town. I swear its going to look awesome. I would post some evidence but I prefer suspense. You guys will just have to wait and see my photos.
Monday, July 7, 2008
I'm Back!
I haven't posted in a while but its because I've been out camping in my Vanagon. Since I last posted I've taken three trips in the van. Sadly, many things have gone wrong in that time and I'm parking the van for now until I get them all sorted out. Here are the latest issues:
1) I've developed a leak under my dash. In addition to my feet getting wet while driving in the rain, I'm really pushing my luck as I drive along watching water trickle all around the back side of my fuse panel. The luggage rack seal on the roof went out around the time that the leak started but I can't quite figure out how that could possibly result in water dumping out from under the dash. I'm going to replace that seal but I think there is a bigger problem here. I'm afraid I'm going to have to pull the dash to get to the bottom of this one. That is going to suck.
2) My rust is certainly getting worse in spite of the rust inhibitor that I sprayed on it. This winter I think I'm going to have to strip the whole van down and sand blast it all out. I'm also going to need to do that panel replacement. That could actually be fun. My plan is to keep things cheap by doing all the body work and paint prep myself. I'm really leaning towards letting MAACO or somebody else do the actual spraying unless I can find a place to rent time and equipment in a paint booth. I would then do the color sand myself and then take it back to them to shoot clear on it. I think I could do all that for under a grand including the cost of the paint (which I would supply them). I'm still researching though.
3) I've got two spots on my frame that I am concerned about. The first is in the front where somebody obviously hit something. This isn't that big of a deal but I want to make sure it doesn't end up rusting the frame. The other spot is more troublesome and it makes me wonder if I shouldn't get another van. Its a hole near the transmission that I just can't figure out. It isn't a rust hole but it is clearly a hole. It doesn't look like it was due to an accident but it is hard to tell. It looks like it was almost intentional but certainly not from the factory. I'll have to take some pictures and let you guys see.
4) This is the latest emergency issue. My exhaust system is basically rusted through. I knew the tail pipe had a growing hole but this past weekend I discovered that the exhaust had cracked all the way around right next to the engine block. So I drove on the edge of my seat just hoping the hot gas I was dumping into the engine compartment wouldn't burn through the fuel lines and burn up the entire van. I took a HUGE risk driving it home but in the end I'm glad I did and even more glad that I made it here safely still the proud owner of a Vanagon. I'm not driving it again until I get that exhaust fixed. The problem though is deciding how to fix it. I'm tempted to just get a complete exhaust system since everything under there looks about a billion years old. I think if I went under there with a good sharp pencil I'd be able to poke a hole in just about every pipe I encounter. The only thing that is holding me back is that I'm not sure when/if I'm going to do an engine conversion. I'd really like some more power. Then again, now is probably not the best time to go switching engines. Plus, I could most likely reuse the muffler, cat, and tail pipe with whatever conversion I might consider. I guess I should just get that full kit.
Wednesday, May 28, 2008
Kitchen Rust Spreading?
Ok so the title is a little misleading but I do have another potential rust issue. The good news is that this rust isn't on my Vanagon. The bad news is that it might impact my 1996 Toyota Tacoma 4x4. The other day I get a letter in the mail from Toyota telling me that from 1995 until 2000 there was a flaw with their corrosion protectant used on the frames of every Tacoma. This has lead to the frames breaking down much faster than the factory intended. They said that I could take my Taco to the dealer (no matter if I am the first, second, or whatever owner) and they will inspect it. Once inspected they will either repair the problem or buy the truck from me. This sounds like a huge loss to me until I dug a little deeper to learn about the details. Evidently if they deem your truck to have a problem they will purchase it from you for 150% of the RETAIL Kelly Blue Book value for an excellent condition vehicle. For my Tacoma that would work out to around $9000. That ain't half bad for an old dirty truck with almost 200k miles on it. I'm setting something up with the local dealer this week to see what they want to do with my Tacoma. Either way it seems like I win so I'm not really all that concerned with the outcome but I am completely impressed that Toyota is taking steps like these to keep customers happy.
Ack Where Are My Posts?
Somehow my posts have been lost in the ether. I posted from my phone a few times last week and none of those posts seem to have made it into the blog. Curse you Interwebs!
Its ok really because there wasn't all that much to report. The biggest event was that I went to a downtown AutoZone in a not so great part of town to see if I could find some parts I need to install my solar panel. While I didn't find what I was looking for, I did find all sorts of "bling" that I could install in the Vanagon. I was able to resist most temptation but I could not avoid the siren song of the eight ball shifter. I bought it and got it installed last Friday. 
The install was actually a bit of a challenge because the previous owner had already installed an after market shifting knob. That alone wouldn't be much of a challenge but he decided he wanted to use some sort of demon spawn adhesive to permanently affix his icon of blandness to my shifter. Let's just say that removal involved the delicate use of a hammer and a 5 in 1 tool. I must say that I had my doubts about there actually being five uses for a five in one tool but I think I've discovered about 12 new ones in the past few weeks.
Wednesday, May 21, 2008
I Didn't Lie!
The speedometer works now!. It turns out that what happened is that my anti-roll bar wiggled its way off of the rest of the front suspension and somehow managed to catch the speedometer cable and crush it. The cable wasn't broken but it was quite smashed. I got the new cable in but now I am trying to figure out what the deal is with my anti-roll bar and what needs to be done to fix it. I was able to just use my hand to get it back in place but I have no idea why it would stay that way. This is a bit of a good thing though because there have been times while I've owned the van that I've been parallel parking it and heard a distinct metallic thud from the front suspension. The anti-roll bar has got to be what I was hearing.
Tuesday, May 20, 2008
Tomorrow the Speedometer Will Work
After doing some research I've learned that my speedometer cable is most likely faulty. The entire time I've had the van the speedometer has bounced but in the past few months it has gotten to the point where it doesn't work at all. That's actually kind of annoying because while I don't really care how fast I am going, I do care how far I have gone. No speedometer means no odometer which means calculating fuel efficiency and what not is impossible. Well, today I am bringing all of that to an end. I've found a replacement cable and will do my best to install it today after work. So cross your fingers or something.
Sunday, May 18, 2008
I'm Not Afraid of Fire
So this weekend I decided to replace all of the fuel lines in the van. I really wasn't expecting it to take all that long but I ended up spending almost 8 hours working on the thing in total. Since I didn't really know what I was doing I was being extra cautious and triple checking that I had dotted all the i's and whatnot. The good news is that it works great and I ran the engine for almost 20 minutes with cardboard underneath it and I didn't see a single drop of gas. I also visually inspected every connection after I had been running for a while and there wasn't any sign of seepage so aparently I have mastered the incredibly difficult art of clamping hoses. It really wasn't a difficult job but any time I'm working with lines that until quite recently were filled with a fuel that is used because of how explosive it it I get nervous.
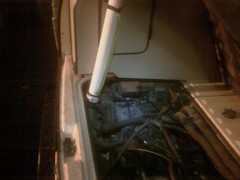
I'm actually quite glad that I finally got around to changing those fuel lines. The Vanagon folk of the Internets are constantly encouraging people to get out there and replace their hoses and I am now a firm believer in their preaching. Most of the hoses in my engine had clearly been changed but I'm not sure that the clamps were rated for fuel injection. Also some of the critical hoses, like the ones connecting the injectors to the fuel rail which is situated directly above the super hot exhaust was clearly the hose from the factory. After 24 years it was brittle and cracking. I'll post a pic soon showing how bad it was. The hose in the worst condition however was the hose just on the other side of the engine firewall. It is really hard to get to if you want to switch it out and I ended up having to bear hug my transmission in order to get my hands into a postition where I could mess with it. That hose was actually cracked pretty badly and I was able to pull it off the firewall connection piece without removing the clamp. Nothing like the feeling of narrowly avoid death in a fire.
Here is what the left side of my engine looks like now:
Here from another site labels all of the fuel lines:
Anyone interested in doing this job should certainly check out http://www.benplace.com/fuel_line.htm to learn how. Here are a few reasons why you should do this job. Here is a picture of my injector line which sits directly above the exhaust: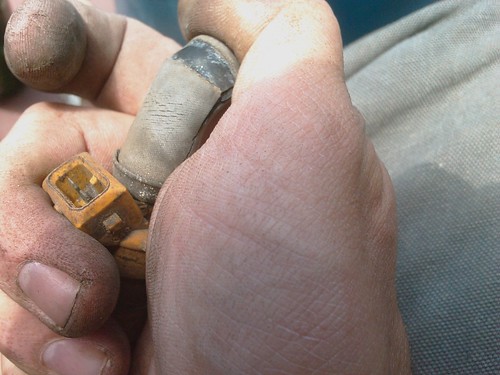
This is what it looked like after I replaced the hose: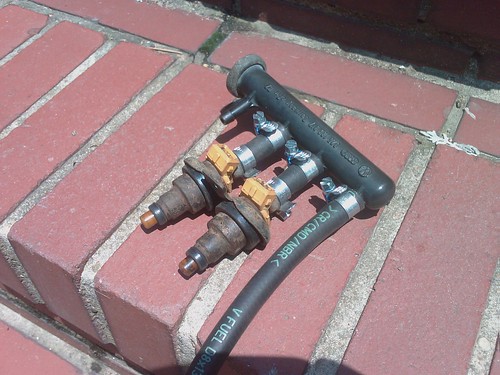
In other Vanagon projects, I hit some of my stainless steel with the old grinder today and I was less than thrilled with the results. Its not going to be nearly as easy as I thought it was going to be to get back that original luster. Granted I haven't used any of the polish stuff that I used on the poptop handle but I expect the grinder to do a lot more than it did. Oh well, maybe if I just hit it with some steel wool and Bar Keep's Friend then it will clean right up. If it doesn't then its painting time. Sweet!
Wednesday, May 14, 2008
Solar!
I'm getting into the world of solar power. Allison and I have talked off an on about making our house a little more energy independent. Ideally we'd love to be able to live off the grid entirely but we aren't willing to pay somebody to do it for us. The problem is that we don't really know what we are doing. So I decided to get a single solar panel and aim to take a low use circuit in our house off of the grid. I'm also going to be collecting data on how much power we can reasonably expect to collect from our roof along with measuring how much power we actually need to run our house. After a year of data collection I hope to have enough experience and information to design a system that we can build to supply our own power. What does this have to do with the Vanagon you ask?
The nice thing about the panel I got is that it is the perfect size/weight/wattage to provide all of the energy that I would need to run a fridge/aux power in the van while on the road. My plan is to just snag the panel off of our roof whenever we've got a camping trip and take it with us. When I get home then I pop it back on the roof. That way I'm not spending $400 to sit a panel on the roof of the van that I will only use a handful of times annually but I'll still have it available when we are ready to roll. I'm not sure how exactly I want to mount the panel on the van but I'll either go with some sort of luggage rack mounting system like they have on the Vanagon For All Seasons site or I will just store it in the upper bunk while we are driving.
This is going to be really fun!
Oh and here is the panel I got
Tuesday, May 13, 2008
Curtain Ties

This weekend I think I'm going to replace the fuel lines in the van. I really don't want to catch on fire so I think replacement is long overdue. It doesn't sound like the job will be especially difficult but I do need to figure out what to do while I have my injectors out. I'd like to get them tested to see if they are still good but I don't really know where to get something like that done. I also don't know if they are easier to test completely out of the van or if that is something that can be done normally. In general I'd like to find a good go to shop that I can call when I need data. I'd really like to know what my engine compression is too.
I haven't been posting much lately and that is partly because I've been distacted by life but it is also because I 've had my head down researching. I'm increasingly bothered by the fact that I'm driving a vehicle that runs on gasoline. With gas prices continuing to rise and all the environmental/political issues associated with gasoline powered combustion engines I think I'm just about ready to hop out of the pool. So I've been researching my alternatives.
I'm already using my bike for most of my short-hop transportation and daily commuting but I really like the idea of being able to travel long distances without buying gasoline - bonus points for not dumping crap into the environment. Sadly there aren't any obvious cheap options but the options are better than I thought they were. First off the WVO route is a whole lot more plausable than I originally thought it was. I mean I would have to do a diesel conversion and install a grease car kit but once that is done I can basically get around for free. We've already got a giant tank installed in our house for the old heating oil setup so with just a little bit of filtration and a good source of WVO I could feasably pull all this off.
Wednesday, May 7, 2008
What Next?
Now that I've got the front cab nearing completion I've got to think about what to do next to the Vanagon. I've got a few thoughts but I'm going to have to stick to cheap/free projects for a bit after spending a decent chunk of change on my new interior. The only really urgent thing that I've got planned is to replace the fuel supply lines like I mentioned in a post a few days ago. My fuel lines don't look like they are in such great condition and I really don't want my van to burn down. I think I'll also try to figure out why I've got a bit of a surge in my idle. I'm at least going to do some of the more straight forward maintanence things just to make sure the surge isn't something simple. I've got a list that I was going to work through that I found on my new favorite site www.van-cafe.com. They got all sorts of handy kits that you can use to do common maintenance work. That is actually where I am getting my fuel line replacement supplies. They have a handy kit that includes all the stuff you need to do the job right.
As far as the interior, I recently discovered that many of the horrible looking metal parts in the van are actually stainless steel and can be cleaned up quite nicely. So far I've only done the poptop latch but there are several hinges, table parts, and other miscelaneous bits that are going to get the grind and polish treatment. I'm also going to see what I can do to make the stove/sink cabinet look better. I found a guy online who is talking about getting a bunch of vinyl letters made to replace the original decals on the cabinet. That will let me go to town with the grinder to remove all the surface rust and repaint. I may also consider replacing some of the trim pieces. The replacement stuff is fairly easy to get, cheap, and the original stuff has shrunk to the point where it doesn't fit very well.
I'm also thinking of plumbing. I'm going to soak my water reservoir with a bleech/water solution for a few days and then see about what it would take to get the plumbing working again. I'm also going to look into adding a second faucet in a place that is more easily accessible. Also, while I was removing the camping equipment before I completely ripped out all of the camping electric so I guess I'll rethink it and then get it back installed.
Of course there is the rust that I'm going to have to deal with eventually. I put a bunch of rust inhibitor on it before I put back in the camping equipment so hopefully I've at least slowed it down. At some point though I might as well do the work so I can be done with it. I'm also really looking forward to getting the van insulated and sound deadened all the way. One of my goals for this summer is to get the ride quiet. I've still got a long way to go at this point but I think it will make the van a lot easier to drive for long distances.
Finally there is my panel/headliner replacement project. After talking my original plans over with Allison we came up with an even better idea. The new plan is to cover all of the panels and headliner with a giant interstate atlas that would be positioned so that it is actually usable. I was thinking of those giant wall maps and how cool it would be to have the entire US interstate system right there on the roof. Just buying one of those wall maps would be several hundred bucks so I'm looking at other options. I may get access to a large format printer that I can use at cost in the not so distant future so I may just come up with my own using Google Maps.
Monday, May 5, 2008
Trip Report!
My wife (who has made it known that she does in fact have a name and shall hence forth be referred to by that name) Allison and I headed out to the beach on Friday night with a nice new oil change and a super clean van. The ride was great but I almost had to physically restrain myself to avoid letting on how concerned I was about having our two German Shorthairs around the newly recovered vinyl seats but I don't think Allison noticed. I'll also admit that I was a little nervous about how reliable the Vanagon actually is at this point. I replaced the fuel pump and filter back in late March but this is the first time that I've driven the van for any sort of considerable distance and I'm not at all convinced that my fuel pump is all there is to the story of that power loss that I had at the beginning of the year. Regardless, the van drove like a champ and I didn't hear so much as a hiccup from the engine during the entire trip.
Here are a few not so great pictures: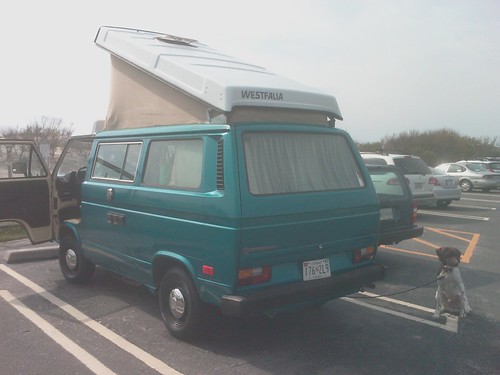
We thought we were getting a drive in campsite but it turns out that our site was walk in. Not exactly ideal but we just parked a few hundred yards from the ocean, hung out with our tent camping friends in the dunes, and then returned to the van to sleep. Not perfect but not terrible either. That is my dog "Bird" there to the side of the van.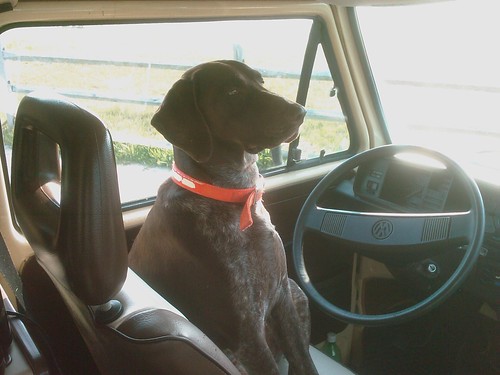
I taught our foster dog "Luna" to drive the van this weekend. She actually did a pretty good job.
A nice closeup of the SewFine seats. I just love those things.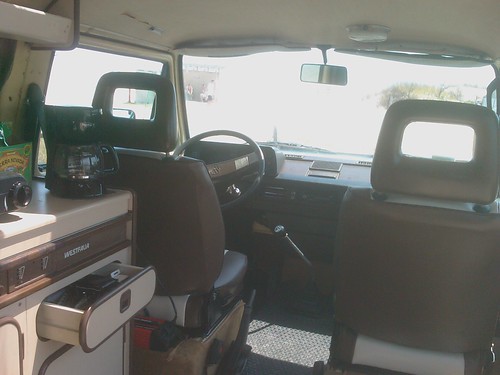
I was trying to show how you could see the dunes out our front window but the picture didn't really come out like I was hoping. Instead you can just see how bad the stove panel looks on the sink/stove cabinet. That will be a not so distant project so stay tuned.
Things I learned/remembered from this trip:
1. Vinyl is actually the way to go if you are actually going to use your Westy to camp. I have had serious doubts about my vinyl selection since I recovered the seats. They are hotter and they are less comfortable to sit on than a cloth would be over a long distance but all doubts will melt away the first time you see your muddy dog hop up into the seat. They hop down leaving a trail of mud, water, and fur all over the place and with a single swipe of a towel and you've got a nice clean place to sit once again. I may have doubted myself there for a bit but the clean factor seals the deal in favor of vinyl in my book.
2. Replacing the foam in the seats on both the top and the bottom may not be needed. Personally, I felt like it was a HUGE difference and worth every cent; however, Allison still felt like the seats weren't all that comfortable. She said that they were plenty padded but that the shape was just problematic for her. I didn't have the problems that she had and I was really happy with the upgrade. My point is that your milage may vary.
3. SewFine seats are awesome. The seat covers are really well made and aren't all that hard to install. I love that there is a company out there like SewFine.
4. The SewFine carpet kit is a little less thrilling. Yes the carpet is well made and the install was easy but I just don't feel like I've got factory carpet installed in the van anymore. The seams kind of bother me and I'd prefer a cut like they used in the factory. Still, it looks nice enough and the clean factor cannot be beaten.
5. They jury is still out on sound deadening. The galley and the rear of the van haven't been touched so the ride is still really loud in the van. I "believe" that it feels like the noise is all comming from behind me but I am not yet convinced that my sound deadening in the cab is actually doing all that much at this point. I do hope to be wrong about that though. Time will tell.
6. The rubber mats that I got from GoWesty are in fact awesome. The indentations in the mats may put you off at first because you are thinking that all they will do is trap dirt but then you should realize that they will also trap liquid. Maybe it is just me but I just spill all sorts of liquid in the van while camping and the mat keeps that problem localized. I am a fan and would buy them again.
7. Removing the fridge was brilliant! The space where the fridge used to be is HUGE and having it available for storage completely changed my van usage flow. I will not be putting the fridge back in. I would be tempted to put in a more modern fridge if I had the ability to keep it running 24/7 via solar but there is no way I would go back to the original fridge. It really doesn't work much better than a five day cooler for my usage and the cooler can be wheeled out to the campfire.
8. A coleman camp stove is as good or better than the Westy stove. I bought a double burner Coleman camping stove a few months ago instead of replacing the propane tank on my Westy and I am really really happy with the decision. I would rather cook out side of the van and I can do that with the camp stove - but if I am really in a pinch then I can just use the stove in the van with the windows open and top popped. Basically I'm not going to fix the stove at this point because the Coleman is plenty for my needs. I'm even tempted to remove the old stove entirely and replace it with a place to sit my coleman stove. Look for that as a future mod.
9. Maybe this is just me but I can't explain how so much dirt/mud/liquid gets into my van while I am camping in it. There is basically no possible way to fight it so you might as well prepare for it. Getting the mats plus the vinyl interior goes a really long way towards being able to keep clean but I'm thinking I need to take things a bit farther. The main thing needed is so way to make the entire galley area water-tight and not allow any moisture to get under the bench seat or kitchen cabinet. I'm thinking I want some sort of poored rubber floor now that will let me get a lip around the perimeter to seal liquids out completely. Rust makes me sad and dumping water behind the stove all the time really doesn't help me out.
10. I really want to get the water tank restored. I'm currently using big 5 gallon jugs to store drinking water. This works ok but I could really use that internal 13 gallon reservoir. I've got it pulled right now and I just need to get it cleaned up to make it really useful. Once I get it into some sort of reasonably clean state then I'd like to rethink my plumbing. The sink is nice and all but I'd really like a way to have a spicket on the side of the van that would let me easily do thinks like wash off feet, grab a glass of water, or fill a dog bowl. I'm thinking I'll just run a second faucet to the bench seat that will let me grab water from there as well.
11. Vanagons are in fact the greatest vehicle ever made.
Friday, May 2, 2008
Setting out Today!
So I've pretty much gotten the van back in one piece now. Wednesday night I finished the second seat and completed my carpet install. I'm really happy with how both the seats and the carpet turned out. I'll get some pictures this weekend so I can post them next week. They look almost better than stock in my opinion. The ride is already really nice. I just hope the wife likes them as much as I do. She'll be taking her first ride in the new an improved van this evening.
With the front cab back in order I focused on getting the camping equipment cleaned up for a reinstall last night. I'm not putting everything back together completely but I'm at least getting all of the cabinents bolted back into the van and the bed back in place. This morning I got everything back into the van but I've still got a fair amount of smaller items to get back together before we leave. I'm going to take off from work early and get the car washed, waxed, and detailed at a local car wash and then I'll head home to get the odds and ends back in before loading up for the camping trip. I'm also going to do a quick oil change before we hit the road along with any other routine maintenance that needs doing. I'll post a trip report when we return!
Wednesday, April 30, 2008
Getting Closer
Last night I ground out the rust, cleaned, primed, and got two coats of black satin paint on my second bucket seat. I don't feel like this one's paint is going to come out as good as my other one but I was rushed and was spray-painting in the dark so I suppose I couldn't have done much better under the circumstances.I still haven't cleaned up the camping gear but at least it looks like my wife will have a chair to ride in. Tonight the plan is to get the seat cover on the second seat and get everything cleaned up and ready for install. I'm going to drive in to work tomorrow (I usually bike) and then if I don't have my spray adhesive in hand by afternoon then I'll go and pick up some sort of replacement. Tomorrow night will be about getting the rest of the carpet kit installed and getting the camping equipment back in the van. I'll do an oil change on Friday and finish up whatever else needs to get done. If I actually get done with any time to spare then I think I'll take the van down to the local car wash for a wash, wax, and detail. After that it's all about camping at the beach!
Tuesday, April 29, 2008
Trying to Get Done
So this weekend is going to be my wife and I's first camping trip of the year with the van and I'm trying to get it back together enough to camp in. Last night I managed to stick a few more pieces of sound deadener in the front cab, put the driver's side door back together, and stripped the second bucket seat down to the metal for prep and paint. I'm hoping to prep and paint the seat frame tonight and then go for the upholstry install on Wednesday night. I made a little more progress on the carpet install but I've still got another hour or two of work ahead of me until I'm finished with it. Sadly, I ran out of spray adhesive so I've got to get some more if I'm going to get the carpet finished by the end of the week.
I also started work on cleaning the camping equipment and I'm hoping to finish that up tonight. Maybe I can get it reinstalled on Thursday night and then I'll at least be ready to roll out on Friday after work. I was originally hoping to take the day off on Friday to knock any remaining tasks while I wait for my wife to get off work but it doesn't look like I'm going to be able to get away from the office that day. I'm just going to have to get everything done in the next couple of days. I might be able to get away a few hours early but its going to be tight.
It is going to be a pretty serious pain to reinstall the camping equipment and then take it all back out again after the trip so I can deal with that rust issue in some fashion but I don't really see another way. My plan in the meanwhile is to just douse the area with used motor oil so I can retard the rust while waiting for the real repair. I've also got to get the oil changed on the van before we roll out so getting all of this done is going to be a little tight.
Monday, April 28, 2008
A Seat is Covered and Sound is Deadened!
This weekend I made a lot of progress on the van's interior. First of all I got the sound deadening completed for the front cab. Its too bad that stuff wouldn't really work so well as a usable surface because I think it looks kind of cool in that a satellite just crash landed in the front of my Vanagon kind of a way. Here's a picture.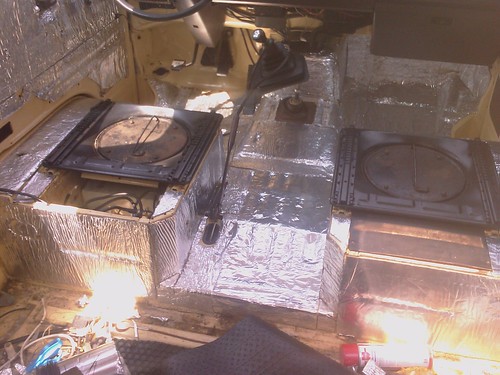
I also got one of my bucket seats finished. Getting the upholstry installed was an epic battle. The guy at SewFine told me that it was going to be a wrestling match and would feel really hard but in the end I would have a nice looking finished seat and he was right. First of all it took a lot longer than I was originally expecting. I had to strip the seat down to the frame to start things off. I was a little surprised by the amount of surface rust on the frame so I decided to refinish the seats. I used my angle grinder to get most of the surface rust off the frame and then just used some Rustoleum satin black paint to cover them. I'm a little concerned about that though because the finish isn't all that hard and I'm afraid I'll just end up with more rust but I talk more about that later. After the parts dried it was time to get the new covers on. The base wasn't too bad to get on but the back was REALLY hard. Not only was it a tight fit but I also had to make sure the foam stayed in position while I pulled the cover on. After that I actually had a tough time getting the seat back reattached to the base. It just takes a bit of a trick to make it happen and I'll cover that later. Anyway, I'm really happy with how the seat turned out. Here is a picture of my new seat next to my old one. Oh and that old one is the "good" one of the pair.
I also got my new carpet install underway. First of all, putting in a carpet kit is non-trivial if you are anal about how it looks. I'm about hald way done and I'm fairly confident that it is going to look good when I'm done but it is really stressful to actually do it. All I can think about while installing it is how mad I'm going to be if it looks like crap and I'm constantly doing stupid things like getting glue on the surface of the carpet. It's really not that hard of a job but if you are a perfectionist about things like installing van interiors then it is stressful. Here is carefully angled shot to try to give an idea about what it is going to look like when I'm done.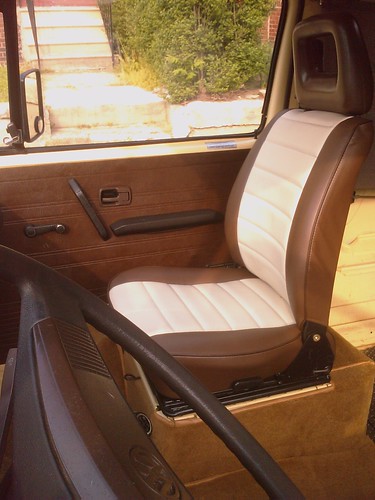
Friday, April 25, 2008
The Seat Covers Are Here!
Today my seat covers from SewFine arrived. Maybe I'll be able to get them on this weekend.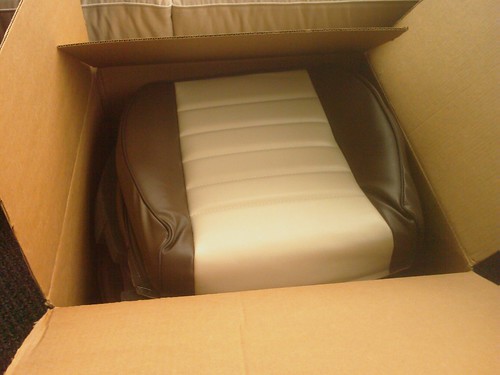
Thursday, April 24, 2008
Best Idea Ever!
So I've been flailing around trying to figure out what I want to do to the panels of the Vanagon. I've thought about painting, upholstering, buying professional replacements, etc. but nothing has really jumped out at me as the right answer until now.
For the past four years I've have a spectacular corner office that has walls plastered with all sort of colorful posters, pictures, and various objects that I've collected over the years. Well, my company has decided that they want to try a new open office floorplan and everyone on my team is going to lose their offices. We're moving to a new space in a few weeks and all of this stuff is going to have to come down. I'm certainly not going to take all this stuff home but then again I'd hate to throw it out. A lot of this stuff reminds of of certain times and places in my life. Its a bit like a scrap book turned into walls. Anyway, I just had a thought. Why not take all this stuff and use it to cover all of the panels in the van! Sure it will be loud and a bit of a color explosion but I think it will be really fun. It will make the van feel really fun and I'll still have a use for all this stuff that I've got to get out of here anyway. If I ever decide to sell the van then I can just make some new panels or buy some replacements and then do something else with my custom panels. I've never seen anyone do this (hehe maybe there is a good reason for that) but I think it will make me really happy with the space. After I glue everything onto the panel then I will use polyurathane or something to get a nice clearcoat finish that would be easy to wipe down if it got dirty. This is going to be spectacular.
Oh and my friend informed me that there is actually a name for this and it is "Decoupage". Here is a picture of one of the walls in my office to give you an idea of the chaos that this will create inside the van.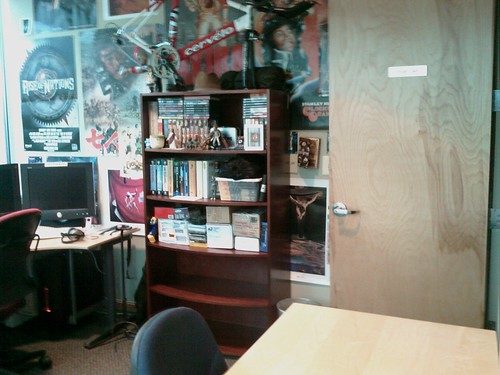
I am excited now.
I Fear Fire
I gather from reading the Internets that spring is the time when many new people buy Vanagons. Since this is my first spring of Vanagon ownership I haven't witnessed this phenomenon previously but I'm here now and reaping the benefits. The Vanagon people are a helpful lot and in an effort to welcome the new owners the email lists are filled with helpful advice on the things that you absolutely must do with a new van. Some of these suggestions are accompanied by horrifying pictures showing you the consequences of ignoring their advice in an attempt to scare you into compliance. I've got to admit that their tactics have worked and I'm now terrified to drive my van until I replace all of my fuel lines.
Evidently high pressure rubber hose isn't really expected to last 24 years and the Vanagon likes to run fuel right on top of its exhaust system. Apparently this problem may not even be visible to the naked eye since the stock fuel line was covered with a fabric which makes it difficult to see rot. To complicate things the injectors themselves are attached to the same rot-infested fuel line but done so in a fashion that replacement is non-obvious. This means that most mechanics would just ignore the injectors and leave what is now bound to be 24 year old decrepit hoses filled with high pressure fuel positioned precariously above very hot and scary exhaust parts. From what I gather fire is a common problem and under the best possible circumstances would only ruin my day.
Now I've gone and just made the situation worse. Since I wrote that last paragraph I went and dug up a shot of my engine to have a look at the lines. In addition to looking old, I'm not entirely sure that the correct clamps were used to attach the lines. Firey Vanagon death looks almost guaranteed without a repair in the near future. I love overreacting.
In other news, I'm making progress on the sound deadening project. I don't have new pictures right now but I have gotten a lot more of the front cab done. I also put some primer on my rust spot from yesterday so by evening that area should be ready for the insulation. I figure I've got another day or two to finish and then hopefully this weekend I'll be able to put in the new carpet. Honestly I'm not thrilled with the color but it is really well made and should last a while. I really hated the dark brown that they were offering so I went with a caramel color that they had. Depending on exterior paint color several vans had this carpet and it looked to me like it might lighten things up against the black floor mats that I use. Granted I haven't installed it yet but I think I liked the color of the old stuff better but I'm really happy to be putting nice clean carpet in the van.
In other other news, I'm thinking of painting my dash. I found some automotive vinyl and plastic paint that I may use to paint my dash. I think I'd be happier with a black dash that has a few dark brown highlights. The only thing I'm not sure of is how long you can expect that kind of paint to last. I'll have to do some searching on TheSamba to see what I can learn.
Wednesday, April 23, 2008
It's All About Angle Grinding!
Yesterday I bought myself an 4.5" 10 amp Dewalt Angle Grinder and a 4" twisted wire wheel. This morning I went out to the van to take care of a rust spot that had created a quarter sized hole in the passenger foot well. Just to fully appreciate my new tool I decided to first try to tackle the job with our 18V Dewalt drill and a wire brush attachment. I made a little bit of headway but I quickly ran the battery down and it was clear that it was going to take a long time to do the job. Then I picked up the grinder and found my new favorite hobby. This thing just knocked the crap out of that rust and set sparks flying. It was awesome! After a finished grinding out the rust I used some rust inhibitor on the area and left it to dry over night. Here is a picture of my first grinding experience.
I've still got a few more spots to deal with up front but at this point I am ready to install sound deadening to all but the driver's side foot well. One thing that is interesting is that it looks like somebody made a rust repair to that area already. It looks like a patch or something has been put in place on that side. I'm not sure what it is exactly but it doesn't look stock. I'm kind of tempted to not mess with that side much and just put some rust inhibitor on it and call it a day. Then again, why skip out on the chance to do some more angle grinding!
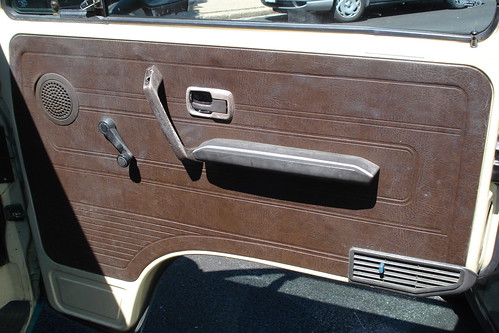
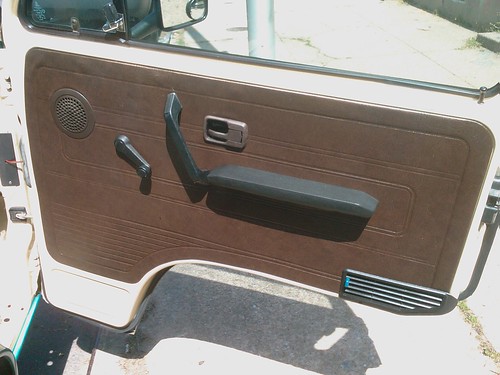
Monday, April 21, 2008
Prep'ed the Cab
Other than thinking about rust, I've also been cleaning up the cab area so I can finally install the sound deadening + new carpet that I got from SewFine. Here's a shot of the cab as clean as I care to make it.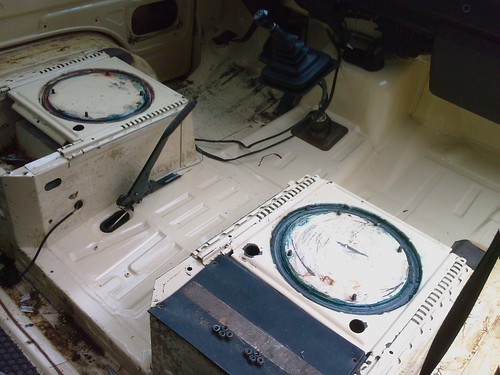
There are a few issues that I've got to deal with before I cover the area in FrostKing. There are a few small rust spots that I guess I better handle. My plan is to just grind it out and then POR-15 over it. Once I get the supplies I need I don't think it will take that long to get done.
Once that stuff is handled then I can finally install the FrostKing. I swear this wasn't supposed to take this long to do. With that in place then I'll go ahead and put in the new carpet kit I got. This might be a stupid idea given the fact that I'm planning to weld in the kitchen area but I never claimed to be a smart man. I'm actually still driving this van on a regular basis even without the interior. My wife and I are fostering a second german shorthair right now so if she and I both want to go somewhere with the dogs then the van is the only option. This means that regardless of the state the van is in, we are going to camp in it in two weeks. I'm just trying to get it back together enough to make that not unpleasant.
One other thing I did was removed the seat bases, cleaned them off, and spray painted them. This was clearly not the best thing to do but its a lot better than it was before. The swivel bases really need to be powder coated if they are going to look really nice and still function well as seat bases but I just wanted to do a quick job to make things look a little nicer for camping.
Speaking of powder coating, I've still got to get myself over to the powder man. I got a bit distracted when I figured out that if I remove my door handles then anyone can get into the van easily. That might not have been a big problem but I decided to just get a second set of door handles off of eBay for $30 so I wouldn't have to worry while mine were at the powder man. I'm also really excited to get the bumpers done. Ok I guess I should figure out when I'm going to make that happen and I should probably take the swivel bases with me as well. They are the perfect kind of thing to powder coat and they are supposed to be satin black. Dang, I really need to get on that if its going to happen before our trip.
What a week and a half its been
Wow, I have neglected my blogging. Much has happened in the world of Vanagon. When I last posted I was planning to sound deaden the driver's door and the cab area. To do that correctly I had to remove pretty much the entire interior and that was when things got complicated...
Here is me getting started: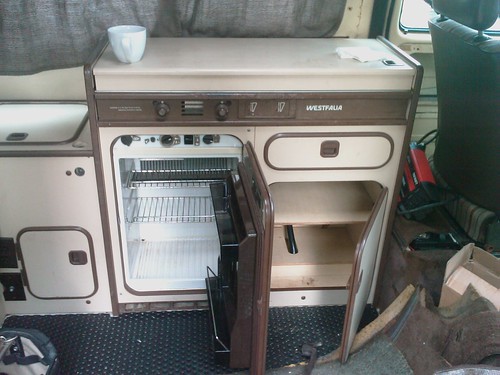
I took the fridge out really easily which gave me lots of confidence: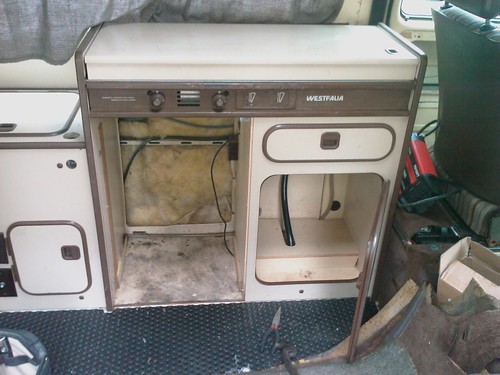
After the fridge came out I went ahead and removed the rest of the sink/stove cabinent. It wasn't exactly difficult but it did take a bit to deal with the gas pipes, electrical wiring, etc.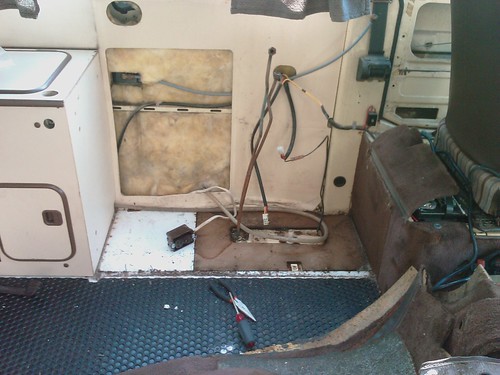
Now if I was smart I would have stopped here and lived in blissful ignorance. Instead I decided to go ahead and remove the rest just to see how bad the seam rust was from the inside. Removing the water tank and its cabinent was a pretty serious pain. Here's a shot of all that out.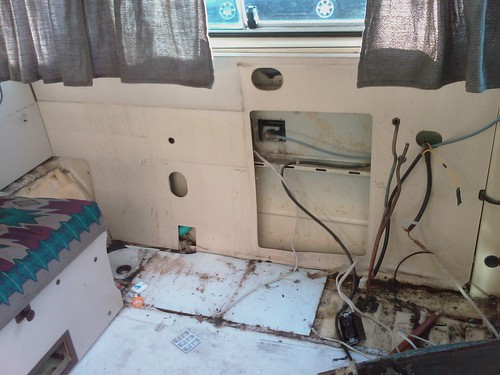
Then the moment of truth came. I decided to take out the side panel and remove the floor and here is what I found.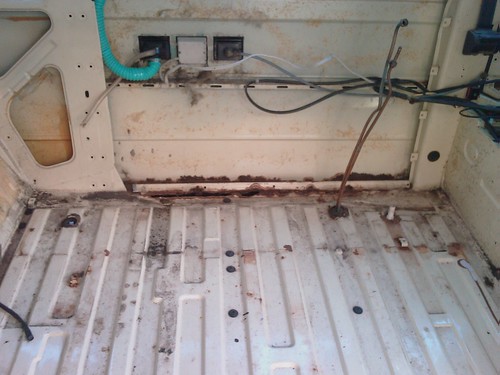
That's right. Horrible, horrible rust! Oh no!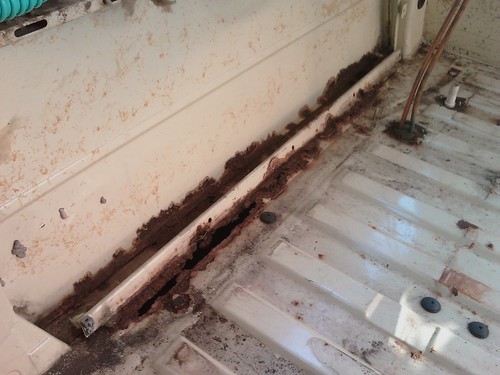
So now everything changes. That rust looks just too bad to ignore. I'm going to have to do something about it. The trouble is figuring out what to do. That rust looked a bit bad for the typical grind it out and POR-15 over it kind of job. I decided I was going to have to add some metal. The problem is that I can't weld, don't have a welder, and don't have a place to weld. That makes things difficult. I thought about getting a few estimates on doing the job, and I still might, but I really wanted to figure out some way that I could take care of this myself.
I started asking around to see if anyone I knew happened to know how to weld or had a welder. I found out that a good buddy of mine who builds furniture happens to have a welder and all the gear needed to use it - plus a place to actually weld in. The only problem is that he doesn't know how to weld either but has been looking for a project to learn on. That's where me and my van come in. The plan is to spend some time researching welding and then we'll get together a time or do and try some practice welds. Meanwhile, I'll order a replacement panel and then when we feel good about things we'll just give it a go. Who knows how good of a job we could possibly do but I feel like trying it. I figure worst case I'll have to pay a shop to bail me out and I wouldn't be all that much worse off than I was to start with.
Subscribe to:
Posts (Atom)